Watch The course Intro
- Full Access to educational videos
- Unlimited teacher support through Telegram
- Free updates
- For all levels: beginner, intermediate and advanced
- Affordable Price
- Pay once and Learn everything
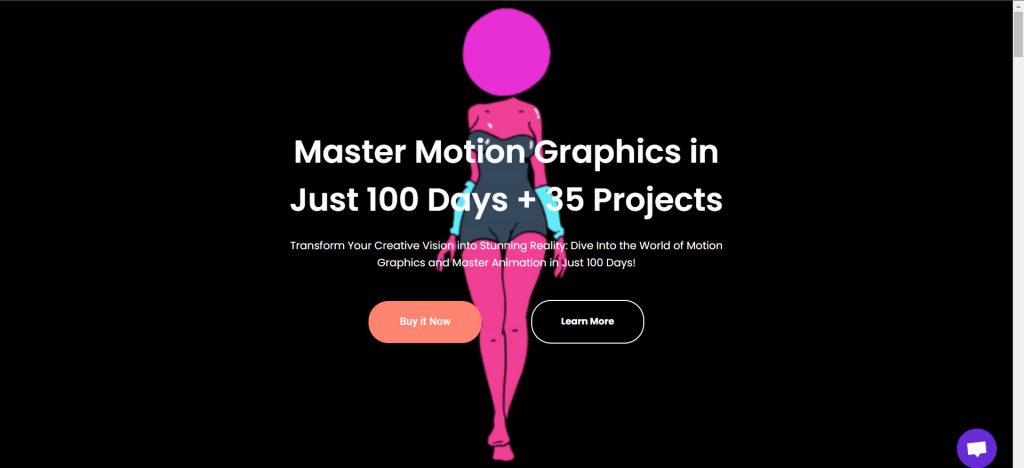
Transform Your Creative Vision into Stunning Reality: Dive Into the World of Motion Graphics and Master Animation in Just 100 Days!
Motion graphics refer to a form of digital animation that combines graphic design with animation principles to create engaging and informative visual content that can be used for various purposes. Motion graphics use moving images, typography, illustrations, and other visual elements to convey a message or tell a story. Motion graphics techniques include 2D or 3D animation, special effects, and compositing, allowing designers to create unique and eye-catching visuals. They can be used for everything from explainer videos to advertising content to title sequences for films and TV shows and logo animations. The use of motion graphics is becoming more and more popular in our digital age, as it allows creators to engage with audiences in a dynamic and visually appealing manner.
This course is designed for anyone looking to elevate their video content with eye-catching motion graphics. Students will learn how to create dynamic animations in Adobe After Effects, one of the industry’s leading software for motion graphics and special effects. Throughout the course, students will explore various animation techniques such as keyframing, pre-composing, masking, and text animation. They will also learn how to work with layers and composition settings to achieve seamless transitions and stunning visual effects. In addition, students will gain knowledge on how to integrate motion graphics into their existing video projects. By the end of the course, students will have developed a strong foundation in motion graphics and will be able to apply the concepts learned to enhance their visual storytelling skills.

Motion Designer, 2D/3D animator
Hey! My name is Hossein Mahdavian, graduated from Full Sail University in Animation. I'm a professional motion designer and 2D/3D animator. I've been animating in Adobe After Effects for over ten years. After five years of working for a UAE-based production company, I have gone freelance full-time and now work from home. Animating as a motion designer professionally is a dream for me. I get to use After Effects every single day for my job.
Powerful praise from satisfied students: See how our services exceeded their expectations and transformed their experiences.
My experience with Motion Graphics Agency was absolutely amazing! I'm about the complete this course and so far the course has been so much fun and informative. If you don't know much about after effects and motion graphics I would highly recommend this course for beginners. Hossein is an excellent teacher and definitely knows how to teach. It is impossible to not learn during this course. The teaching style is that good 🙂 Lastly, Teacher assistants are also a great help for your learning journey in this course. Their feedbacks and guidance are on point.

For me it was learning in connection with life itself, course was so harmonically incripted in my life, it was just what I wanted/ what I needed. And it feels like something is given to you, it feels not just like you Learning something, it's more like they giving you knowledge. The teacher is Greate, the community is awesome, and the class was so deep in all aspects given. Amazing course, awesome School!! You are simply the best! Appreciate and thanks for letting me be a part of the class Motion Graphics Agency!
The course, Learn Motion Graphics in 100 Days + 35 Practical Projects + Free Updates (Beginner, Intermediates, and advanced) is one of the most complete courses for making motion graphics in the world, so from the zero stage, i.e. installing the After Effects Program, to the stage of creating real professional projects. In this course, I have explained all the after-effect features that are necessary for motion designers, and after learning the tools and techniques, we have done a project as an exercise so that the subject will stay in your mind forever, and you never forget when and Where to use that tool or technique. I tried to give an example of a project after introducing one or more tools or techniques, and I increased the number of projects to 35 in the beginner course, so that after doing these 35 projects, you feel that you know everything about making motion graphics. To see the projects taught in this course, refer to the bottom of the page.
Of course, you have to practice for several hours a day to master all the tools and techniques, and no one can claim that he has become a master of motion graphics by watching the course. No, it is not true. You must practice and practice for at least 6 months to a year to learn all the techniques and tools. You must observe, analyze, and imitate professional motion graphics to ultimately lead to creativity. No one can show creativity in the first place, and it is through practice, imitation, and repetition that gradually that practice becomes the queen of your mind, and then after learning all the techniques, you can show your creativity and create motion graphics. Implement what moves in your mind in the powerful After Effects program.
If you do a little search on Google, there are many sites and schools that teach motion graphics, like motion design school or school of motion. You can even find free tutorials on Youtube. But why should you buy this course from motion graphics agency? Well, there are many reasons, some of which I will discuss below:
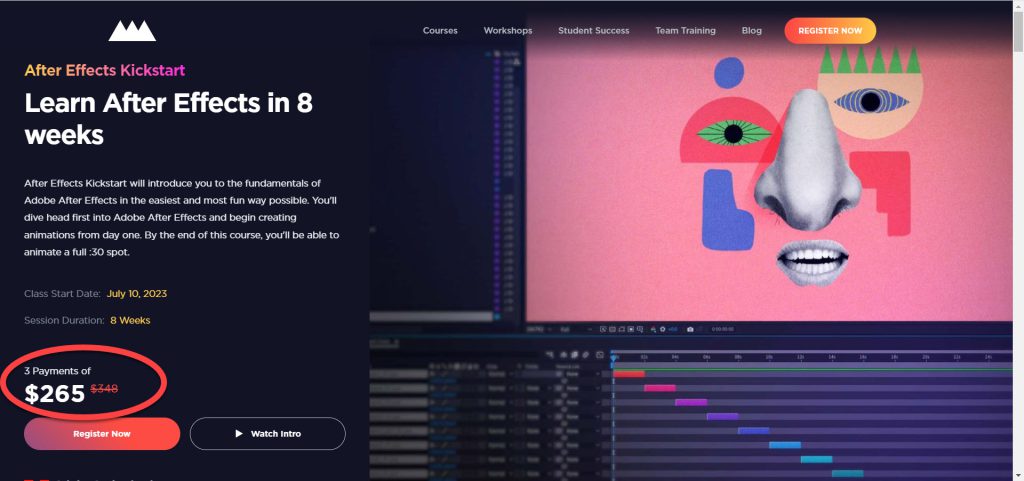
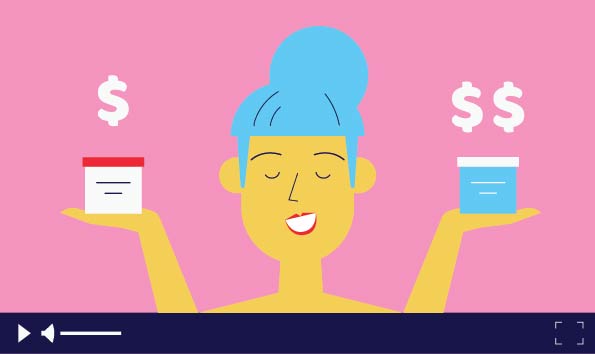
for example, on the School of Motion website, you have to pay $1000 to learn the basics of after effects and motion graphics, which they teach with two to three projects. If you want to learn motion graphics professionally, you have to spend tens of thousand dollars. Also, the price of training in motion design school is high and few people can afford to pay such amounts of money to learn motion graphics. But in Motion Graphics Agency you can purchase the tutorial at an affordable price.
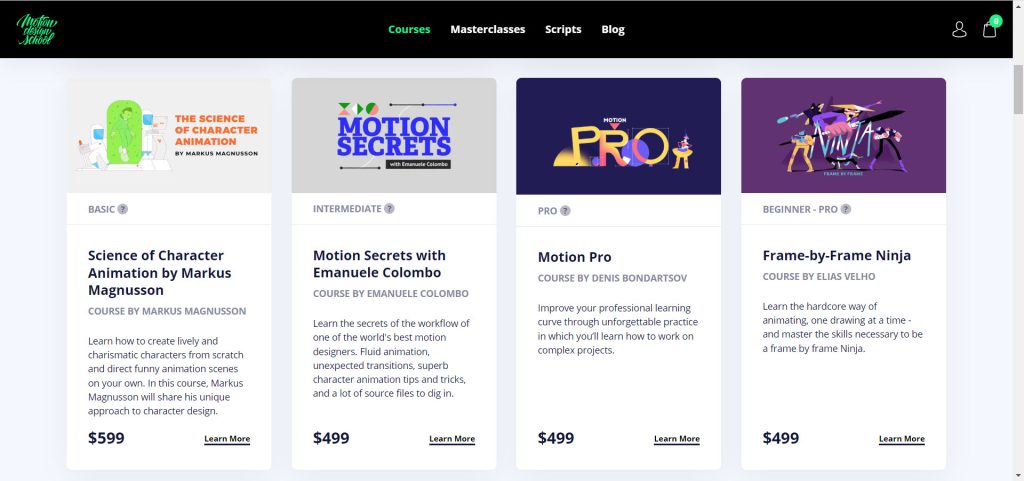
In online schools such as the School of Motion or motion design school, you have to pay a separate amount to learn each level. For example, beginner level separately, intermediate separately, and advanced separately. Also, you have to buy the character animation and the logo animation separately, which will be very expensive. But on the motion graphics agency site, you pay once for training and you will have access to all levels (beginner, intermediate, advanced, character animation, logo animation). The course will be updated for free and new training will be added.
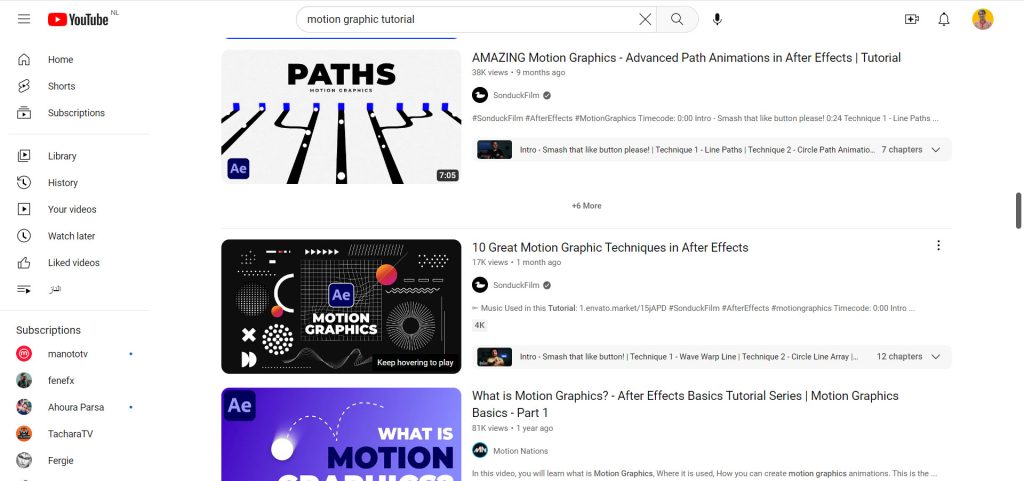
There are a lot of free tutorials available on YouTube, but they are scattered and it’s difficult to get a comprehensive and complete education from YouTube alone. But the motion graphics agency training is designed in a special order. You will get acquainted with various motion graphics tools and techniques in a specific order, and then you will learn the topic with a practical project.
I am Hossein Mahdavian, graduated from Full Sail University in animation, have more than 15 years of teaching experience and animation production experience, and so far I have worked with many companies around the world and created animation and motion graphics for them.
Course support is a valuable resource for students seeking to improve their motion graphics skills. As a student, you can send your work to course support for review and feedback. This feedback can help you identify areas where you need improvement and provide guidance for making edits. This support can help you refine your approach to creating motion graphics and improve your final product. Additionally, course support may offer additional resources for students such as tutorials or access to industry professionals. Overall, course support serves as a helping hand for students looking to enhance their skills and gain confidence in their abilities.
When it comes to instructional videos, a key aspect that learners appreciate is the seamless delivery of content. It’s beneficial when tutorial videos are not fast-forwarded or abruptly cut in the middle, allowing viewers to grasp concepts from start to finish. These videos provide a clear and straightforward explanation, ensuring a smooth learning experience. By maintaining a coherent flow throughout the tutorial, learners can easily follow along, absorb information, and apply the knowledge effectively.
You don’t need any prerequisites to learn how to create motion graphics with After Effects. I have taught you everything in simple language and from scratch so that even if you have just started learning computers, after completing the course you will be able to easily produce professional motion graphics and publish them on your social media and start earning money. The teaching of this course is project-based. it means you will learn motion graphics with 35 real projects. so after learning a few tools or techniques, I have given an example in the form of a project so that the subject becomes the queen of your mind, and after passing this course, you will be able to create real projects and publish them on your social media. In this course, we have tried to avoid teaching theoretical and boring topics and directly teach practical projects in the shortest possible time. the new tutorials will be added soon.

Yes, When it comes to motion graphics courses, having access to support and direct communication with instructors is crucial for students. Here are some reasons why this type of interaction is essential:
Clarification and Guidance: Motion graphics can be complex, and students often encounter challenges and questions during their learning journey. Having direct communication with instructors allows students to seek clarification and receive guidance on specific concepts, techniques, or projects. Instructors can provide personalized feedback and offer valuable insights to help students overcome obstacles and progress in their learning.
Individualized Feedback: Feedback is invaluable for growth and improvement. By having direct communication with instructors, students can receive personalized feedback on their work. Instructors can pinpoint areas of strength and areas that need improvement, offering specific recommendations and suggestions for enhancing their motion graphics skills. This targeted feedback accelerates the learning process and helps students refine their craft.
Real-time Problem-solving: Sometimes, students encounter technical issues or face creative roadblocks that require immediate assistance. By having direct access to instructors, students can address these challenges in real-time. Instructors can provide troubleshooting advice, share alternative approaches, or recommend specific resources or tools to overcome hurdles. This level of support empowers students to tackle problems efficiently and continue their progress without unnecessary delays.
Mentorship and Industry Insights: Instructors with professional experience in the motion graphics industry bring valuable insights and mentorship to the table. Direct communication allows students to tap into this expertise and gain a deeper understanding of industry trends, best practices, and career opportunities. Instructors can share real-world examples, share their own experiences, and provide guidance on how to navigate the industry successfully. This mentorship fosters a well-rounded education and prepares students for the demands of the professional world.
Building a Network: Direct communication with instructors fosters a sense of community and connection within the motion graphics course. Students can interact with their peers, participate in discussions, and collaborate on projects. This networking opportunity allows for the exchange of ideas, feedback, and potential collaborations that can enhance the learning experience and lead to valuable professional connections.
In conclusion, support and direct communication with instructors are essential for motion graphics students. It enables clarification, individualized feedback, real-time problem-solving, mentorship, and networking opportunities. By establishing this line of communication, students can maximize their learning potential, receive personalized guidance, and gain valuable insights into the motion graphics industry.
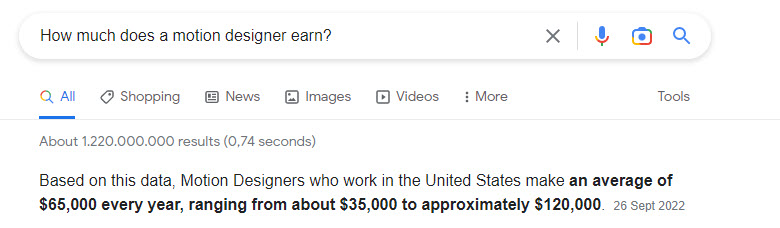
Motion design is a field of animation that focuses on creating moving graphics and visual effects for various media platforms such as television, film, and digital advertising. Motion designers can generate a steady income by providing their skills to various industries who need animation services. The income generated by motion designers varies based on their experience, skill sets, and industries they work for. A junior motion designer can expect an average salary of between $35,000 and $65,000 per year, while experienced designers can earn salaries of up to $150,000 or more annually. As businesses continue to shift towards online operations and digital media, demand for motion design services is on the rise, creating a great opportunity for students who want to make a career in this field. With their creativity and software skills, motion designers have the potential to earn a significant income while enjoying a fulfilling career.
Are you interested in learning more about motion graphics but unsure of where to begin? We are pleased to inform you that free tutorials are available for you to explore! Our tutorials provide an in-depth overview of the subject, offering valuable insights and information that you might not find elsewhere. Additionally, you can evaluate how the instructor teaches in this course and determine if it’s right for you. You can use this opportunity to seek out information, ask questions and gain an understanding of what to expect if you decide to pursue the course. Don’t hesitate to check out our free tutorials as they can be an excellent resource to enhance your learning experience!
In the following section, I have explained the chapters of this training course completely, and you will get to know the content of each chapter and you will understand what topics were taught during the course. New tutorials and chapters are added over time.
In the first chapter of this training course, you will get to know the necessary programs for making motion graphics and you will learn how to install these programs on your computer.
Adobe After Effects is actually the core of creating motion graphics. With this powerful program, you can produce attractive motion graphics.
In this video you will learn how to remove Adobe After Effects from your computer.
In this chapter, you will get to know the different parts of the After Effects program, including the menu bar, toolbar, panels, layers, and timeline.
In this section, you will learn each part of the After Effects program is used. You will get to know the project window, layers section, timeline, toolbars, and panels briefly.
In this section, you will learn what a workspace is and how to change your workspace and move windows to your taste and save it as a dedicated workspace.
In this section, we will learn the difference between vector and pixel by using two programs, Illustrator and Photoshop, and also learn which program is more suitable for working with motion graphics.
In this section, you will learn the concept of composition in After Effects. You will learn about NTSC and PAL video standards and different types of standard video sizes in After Effects.
In this section, you will learn how to save a project in the After Effects program, and you will also learn how to open a previously saved project in the program and continue working. Also, when we forget to save the project, there is an option called Auto-Save, which saves the project in the path we specify.
In this section, you will learn about two useful tools, zoom and hand tool. The hand tool is used to zoom in on a part of the project and to see different parts of the preview window. We also learn about the shortcut keys of these tools.
In this part, I will give you an exercise and I will give you 5 seconds to stop the video and do the exercise that I asked you, which is to create a composition with desired specifications. You do the exercise and then watch the rest of the video and see if you did the exercise correctly or not.
In this section, you will learn how to import the various files you need to build your project. Vector files, Photoshop, photos, videos, audio, etc.
In this section, you will get to know the concept of layers and learn how to create new layers and manage them. For example, hide them, lock them, change their color, and…
In this section, you will learn about the timeline section. The layers section and the timeline are directly related to each other, and whatever we do in the layers section will directly affect the timeline section. You will learn about CTI, you will learn how to manage the work environment, and most importantly, you will get to know the shortcut keys.
In this section, you will get to know the settings and buttons under the Preview window and learn each option is used. You will also learn about Anchor Point and Rotation Tool. In the following, you will learn how to save a frame of motion graphics, and how to render a specific frame of motion graphics and send it to our friends.
In this section, you will learn another tool, the Text tool, and you will learn how to change the font of the text, change its color and manage it.
In this chapter, you will learn how to layer the vectors you need to create motion graphics in the Illustrator program and import them into After Effects. It is also the same in Photoshop. You will learn how to edit vector files in After Effects
In this section, you will learn how to find the designs we need to make motion graphics and edit and layer them in the Illustrator program and make them ready to import into After Effects.
In this section, you will also get to know the different options of import window when you import a vector file into After Effects. How to import the vector file as layers or import only a specific layer or import all as one layer?
In this section, you will also learn what to do if we want to edit a vector file after importing it into After Effects.
In this section, you will learn how to layer and import a Photoshop file into After Effects, and you will also learn how to do this if something needs to be edited and changed.
In this section, I will give you an exercise. You open a vector file in the Illustrator program and according to the principles I will tell you, you arrange its different layers in the timeline.
In this chapter, you will get to know the rest of the tools and different parts of After Effects, which I will explain in detail below.
In this section, you will learn how to organize your files regularly in different folders before starting the project so that you don’t get confused and prevents making mistakes later during the project. We will also learn how to reopen a missing file so that the project works properly. You will get acquainted with the possibility of Collecting different files from different drives that are used in the project, and at the end, you will learn how to delete unused files from the project window.
In this section, we will learn that if we drop several photos in the composition window at the same time, a window will open that can be used to make simple slideshows.
In this section, you will learn two widely used After Effects tools, the Shape tool, and the Pen tool, and there are many tips and shortcuts while working with these tools, and I have explained every one of them.
In this part, you will also get to know one of the principles of After Effects, that is, parenting, or the father-child relationship. In such a way that if the father does a certain thing, his children will do the exact same thing because they are connected to their father.
In this section, you will get to know different types of after-effect layers and understand their usage with examples. Among these layers are the Shape, Solid, Null, Adjustment layer, and Camera layers. You will also learn how to delete the internal cache of the program if the speed of your After Effects program slows down so that the speed of the program increases.
In this section, you will get to know the Align panel. From this panel, you can arrange different files on the screen, for example, place the text exactly in the middle of the page or place it exactly on the top right. It is also used to sort multiple shapes on the page.
In this section, I prepared an exercise for you that asks you to recreate a scene using shapes and the Align panel. I give you 5 seconds to pause the video and do the exercise, and if you forget, play the video and you will see how I did it.
In this section, you will also learn how to work with masks. Masks play an important role in the After Effects program and in motion graphics, you have to practice a lot to become a master at working with masks.
In this chapter, you will learn about the different options of the transform section. You will get to know the term keyframe and how to produce attractive animations using keyframing.
In this section, you will get to know the different options of Transform and also learn its important shortcuts. Among these options are Anchor Point, Position, Rotation, Opacity
In this section, you will get to know the term keyframe and understand how to use keyframes to create an effect.
In this section, you will learn how to use shortcuts to create keyframes and speed up your work in creating motion graphics.
In this section, you will learn about two important parts of After Effects, i.e. the value graph and the speed graph. Although we don’t use the value graph much in making motion graphics, knowing it is better than not knowing it. Most of our focus in motion graphics is in the speed graph section because by increasing and decreasing the speed of an object in After Effects, we can achieve attractive animations.
In this section, you will get to know another important panel in After Effects called the Effect and presets Panel, which spends most of our time in After Effects in this Panel.
In this chapter, you will learn the principles of rendering in After Effects and Adobe Media Encoder.
In this section, you will learn how to export the animation you made in the After Effects as a video using the Render Queue option.
In this section, you will learn how to export the animation made in After Effects by Adobe Media Encoder. This program has more features and formats compared to the Render Queue option of the After Effects program, and we will render all our animations through this powerful rendering engine.
In this project, we will animate a very simple scene together and you will get to know the principles of keyframing during the project.
In this chapter, you will learn about some important techniques in motion graphics.
In this part, you will learn about the motion blur option in After Effects. We use this technique to create scenes where the movement is fast and the object is seen blurry, for example, the scene of throwing a knife at a stick.
In this section, you will learn about one of the most used techniques in making motion graphics, I mean Track matte technique. If you want to show something outside of something else or place an object in a range that cannot be seen, we use the Track matte technique. The application of this technique is almost like masks in after-effects.
In this chapter, we explain a series of common mistakes made by beginners, and also we will talk about the solutions. We will do many exercises together in this section and we will learn some new methods and techniques.
In this section, you will learn about some of the most common mistakes made by beginners in After Effects. Be sure to see this section because it may happen to you.
In this section, we have mentioned a series of important tips that should be followed while working with the After Effects program.
In this section, you will get to know two other panels, namely motion sketch and Smoother. These two panels are used to make curves. For example, when you want to move a rocket in a path, you can use these tools.
In this section, you will learn about the mood section of layers and its usage, and you will also understand when you should use the Color key linear effect in your projects.
In this section, you will learn about the chromaki screen or green screen and how to remove it.
In this section, you will learn what pre-comp is and how we should make a pre-comp and when we should put layers in the pre-comp.
In this section, you will learn how to animate a police car using the techniques you have learned so far.
In this section, you will learn how to shrink your precompositions with the help of the Region of interest option.
Pong is an old game that we used to play on old Atari consoles. In this section we will learn how to animate this game.
In this chapter, you will learn about various animating techniques in After Effects and we will work on several projects.
When we right-click on a video, an option named time also appears, which we have discussed in detail in this section. Also, when we right-click on an object or image, it has settings related to the Transform section, which you will learn about in this section.
In this section, we will learn about different types of effects that can be applied to Shapes.
In this section, you will also learn how to apply motion effects on your text layer and animate them.
Layer style is used to give different modes to a layer. For example, put a shadow behind an image or highlight or indent your text.
In this part, we will make a simple logo motion with the techniques you learned in this chapter.
In this part, we will animate the same logo motion that we made in the previous part in a different way.
In this part, we will make a professional logomotion using reverse engineering technique.
Bouncing Ball is one of the exercises that every animator should do in every program he/she is learning. Two important principles of animation must be observed while making a bouncing ball, and that is squash and stretch.
In this part, we save the ball animation as a preset, so that in the future, if we need to animate the bouncing ball, by dragging and dropping it on the ball, all the animations will be applied to it, so you don’t have to make all of them from scratch.
In this chapter, you will learn about another after-effect tool called Poppet position pin tool, and we will do several exercises together.
Another useful tool in After Effects is the poppet position pin tool. This tool can be used to move things that don’t require bones, for example worms or finger movement.
In this section, we will run a game on the phone with the techniques we have learned so far, and we will animate the loading and running part.
In this part, we will learn how to animate a sphere.
In this section, we will get to know several effects of the After Effects in a practical way, and we will make beakers and fire.
In this chapter, you will learn about expressions to speed up the creation of motion graphics.
The After Effects program is a powerful program in the field of making motion graphics, and Expressions help a lot to become more professional and speed up the making of motion graphics. In this section, you will learn about some of the most important expressions for making motion graphics.
In the previous chapters, we animated a police car in the traditional way, but in this part, we are going to animate the same project this time with the help of expressions and see how much these expressions help us in speeding up the creation of motion graphics.
In this section, we simulate the movement of the mosquito with the help of expressions, and then we animate a street lamp.
In this section, we will animate a clock with its pendulum using expressions.
In this chapter, like the previous chapters, you will learn more techniques.
Proxy is used when you import a high-quality video, for example 4K, and the speed of working with the video is very low, and with the help of the proxy option, it can be temporarily replaced with a lower quality version to increase the speed of work and At the end, when rendering, you can activate the original quality video and render it
In this project, you will learn how to create handwriting text. Suppose you want to display your name in handwritten form on the screen.
In this project, you will also learn how to create a magnifier with the help of effects.
In this section, you will also learn about after effects Transitions.
In this project, you will learn how to make a custom equalizer that moves when the music plays.
In this project, you will learn an important technique in after effects called Camera tracking and Motion tracking and you will find out where you can use this technique.
In this section, you will learn how to move the camera in a 2D scene.
in this video with the techniques learned in the previous lessons, we will make an attractive logo animation. we will also animate a 2d camera.
in this project you will learn line art technique in motion graphics. Also you will learn how to animate 2d cameras in this project.
In this chapter, you will get to know one of the most used motion graphics plugins called Motion 3, and we will create projects with the help of this powerful script.
In this section, you will get to know the various features of Motion 3 plugin with numerous examples, and then you will understand when you should use its features.
In this project, you will learn how to animate mobile, and with the help of this powerful script, we will add more attraction to our animation.
In this project, we will create an attractive liquid logo motion with the help of Motion 3 plugin.
In this project, you will learn how to animate another logo motion.
In this project, you will learn how to animate a pattern. These patterns are used to create animated backgrounds.
In this project, you will learn how to animate a camera. You can see the result of these animations at the end of this page.
In this project you will learn how to animate a plane. You can see the result of these animations at the end of this page.
In this project you will learn how to animate a shop. You can see the result of these animations at the end of this page.
In this chapter, you will learn about different morph shapes techniques.
In this section, you will learn about different types of morph shapes in After Effects. For example, how to convert a circle into a square, a square into a triangle, and a triangle into a plane.
In this section, you will learn how to install and work with the super morphing script. We will convert fruits into logos and you will learn to work with this powerful script with numerous examples.
In this project, you will learn how to morph a laptop into a phone and a phone into a clock.
In this project, you will learn how to transform a table into a closet and a closet into a lamp. In this project, you will get to know several animation rules in a practical way.
In this chapter, you will learn the basics of 3D layers and we will make several projects together. You will also learn to work with 3D cameras and we will work on a project together.
In this part, you will learn how to convert a 2D layer into a 3D layer, give it depth and finally animate it. We will animate a heart in 3D.
In this part, we will learn how to make a 3D clock and animate it.
In this section, you will learn how to create a 3D camera in After Effects and learn about its settings.
In this project, we will create a travel project on the map with the help of 3D cameras. You can see this project below.
In this chapter, you will get to know two plugins, motion bro and animation composer, and we will work on two projects together.
In this section, you will learn about the professional transitions of the Motion bro plugin and learn how to use these transitions between two scenes.
In this section, we will add a background and text for the 3D clock project that we made in the previous chapter.
In this section, you will learn how to install the animation composer plugin on After Effects, and you will get to know the various features and capabilities of this powerful plugin.
In this project, you will learn how to rotate the moon around the earth. We will use the technique of 3D layers as well as the features of the animation composer plugin to build this project.
In this part, we want to make a cool story motion. We can use this story motion in the Instagram story as an advertisement or use it in reels. In the first step, we design it in Photoshop and prepare it for animating in After Effects.
In this section, we import the design we designed in Photoshop in the previous section into After Effects and animate it step by step, and prepare it for publishing on Instagram.
Well, from here on, the intermediate level of this course will begin. In the chapters ahead, you must master the beginner level to being able to build the projects presented at the intermediate level. So, the prerequisite for the intermediate level is the beginner level. At this level, the basics of After Effects are not taught, but you will get to know the techniques of creating different projects. At the advanced level, these topics become very heavy and advanced.
In this chapter, you will learn how to animate the Yahoo logo motion beautifully. You will also learn how to make an attractive motion story.
In this part, you will get to know how the Yahoo logo enters the scene and we will animate it from A to Z in the After Effects program.
As you know, every logo has an intro section and an extro section. In this part, you will learn how to animate the extro of the Yahoo logo motion.
in this part you will learn how to rasterize any logo in illustrator and prepare to animate it in after effects.
in this section you will learn how to animate binomo logo animation in After Effects.
In the section below, you will see the final result of the projects that you will learn in this course.
But before we get to that, let’s quickly recap what you’re getting:

We are confident that our Motion Graphics Course will meet and exceed your expectations. However, we understand that personal preferences may vary. That’s why we offer a hassle-free refund policy.
If, for any reason, you find that the course doesn’t align with your learning goals or if it doesn’t meet your expectations, we provide a 30-day money-back guarantee. Simply reach out to our support team within 30 days of your purchase, and we will promptly process your refund, no questions asked.
We genuinely want you to be satisfied with your learning experience, and we believe in the value and quality of our course. So, enroll today with confidence, knowing that your investment is protected by our refund policy.
Unlock the world of motion graphics, explore your creativity, and become a skilled motion designer risk-free.
Enroll now, and remember, your satisfaction is our priority!


$499.00 $99.00
Sandra Striseuz (verified owner) –
I’ve purchased an online course called (Learn Motion Graphics in 100 days) and I am happy to the level I reached while , it taught me the basics of designing motions and developed my skills in designing.
Tara Rippin (verified owner) –
My experience with Motion Graphics Agency was absolutely amazing! I’m about the complete this course and so far the course has been so much fun and informative. If you don’t know much about after effects and motion graphics I would highly recommend this course for beginners. Hossein is an excellent teacher and definitely knows how to teach. It is impossible to not learn during this course. The teaching style is that good 🙂 Lastly, Teacher assistants are also a great help for your learning journey in this course. Their feedbacks and guidance are on point.
Dexter Pagac (verified owner) –
For me it was learning in connection with life itself, course was so harmonically incripted in my life, it was just what I wanted/ what I needed.
And it feels like something is given to you, it feels not just like you Learning something, it’s more like they giving you knowledge.
The teacher is Great, the community is awesome, and the class was so deep in all aspects given. Amazing course, awesome School!!
You are simply the best! Appreciate and thanks for letting me be a part of the class Motion Graphics Agency!
Sheryl Bradtke (verified owner) –
This is the first time that I am satisfied with a course and I really did not waste my money. I highly recommend this course.